


3V@~QDUHVCO2A)U6Q")
This post comes with the guide to repair BMW FRM Module using xprog box programmer.
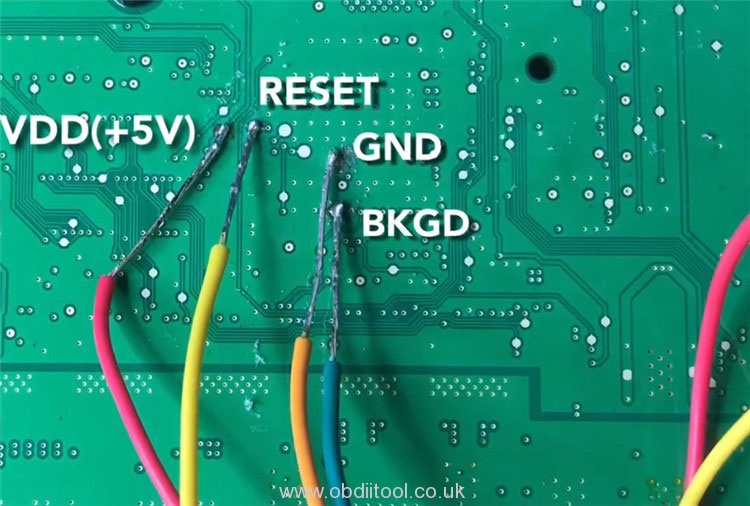
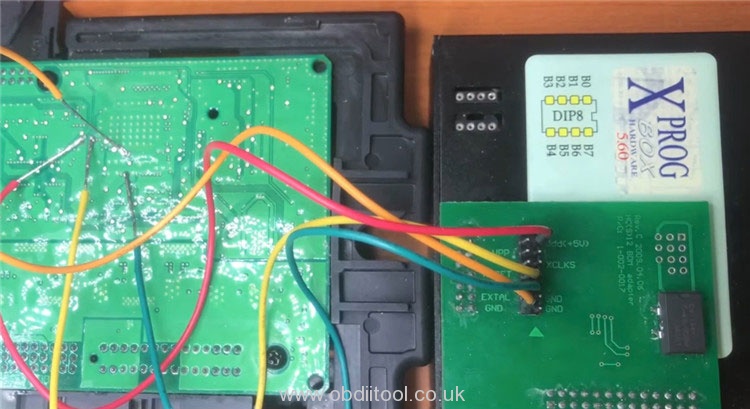
Connect 9(S)12 BDM adapter to XPROG programmer, then weld all lines incl. VDD (+5V), RESET, GND, BKGD on adapter to the corresponding position on BMW FRM module
Run Xprog software (here used is v5.6.0)
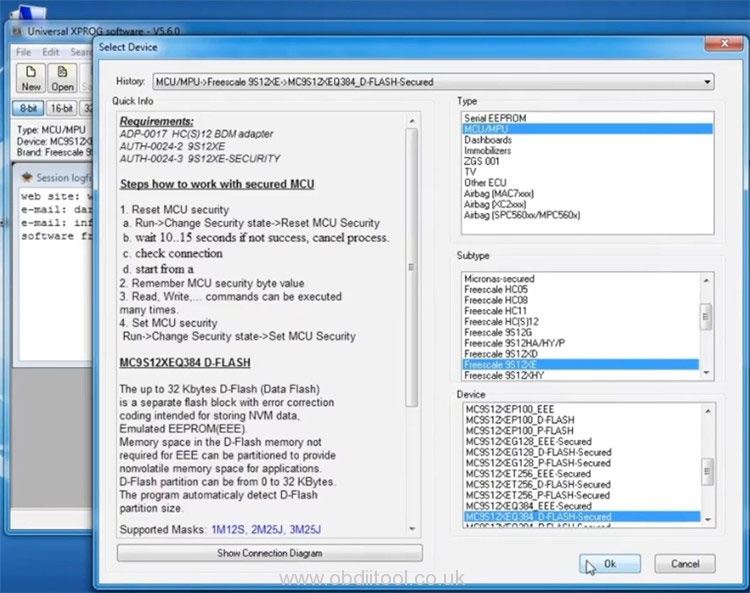
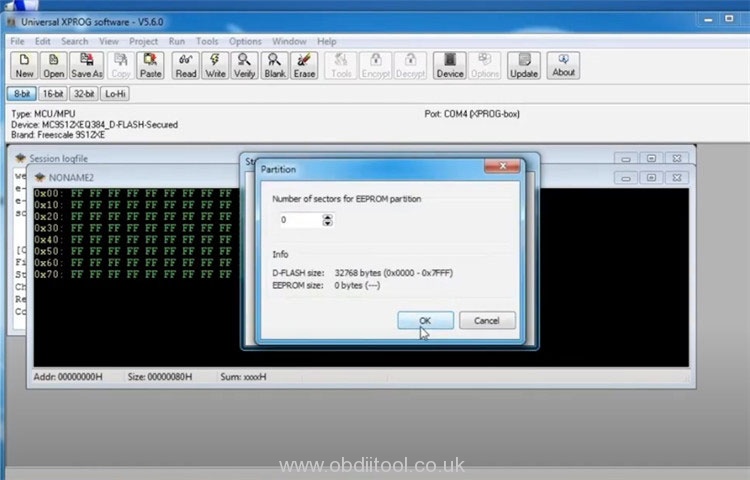
Click “Device” to select type, subtype and device: MCU/MPU-> Freescale 9S12XE-> MC9S12XEQ384 D-FLASH. Secured
Then tap “OK”
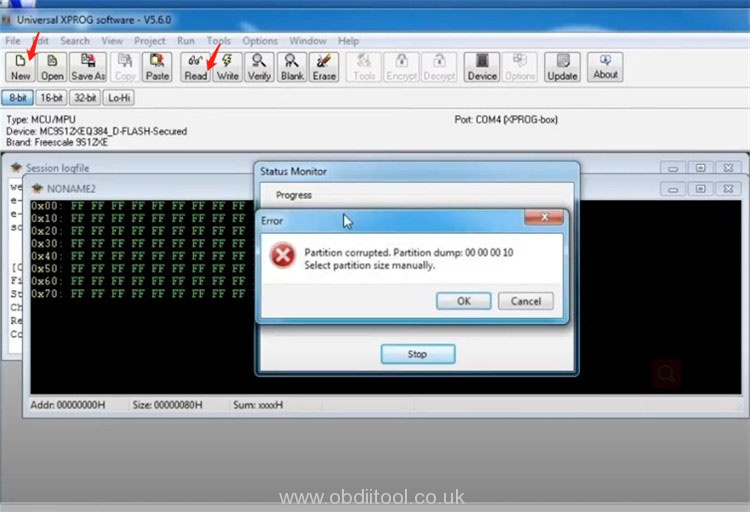
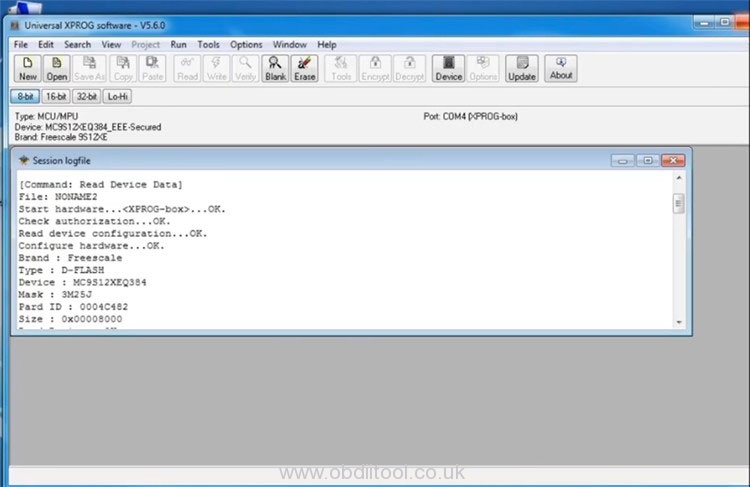
Click “New” and click “Read” to read device info
If it shows error “Partition corrupted. Partition dump: 00000010. Select partition size manually.” Please click “OK” to continue.
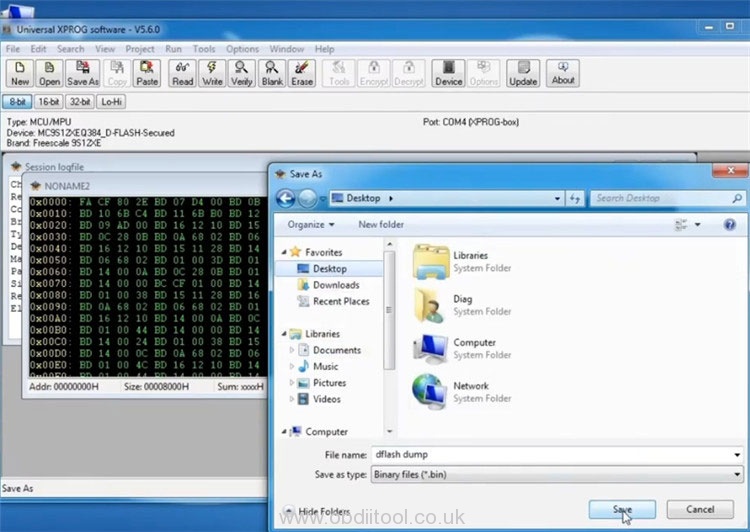
Read the DFLASH data successfully, then click “Save as” to save the original data
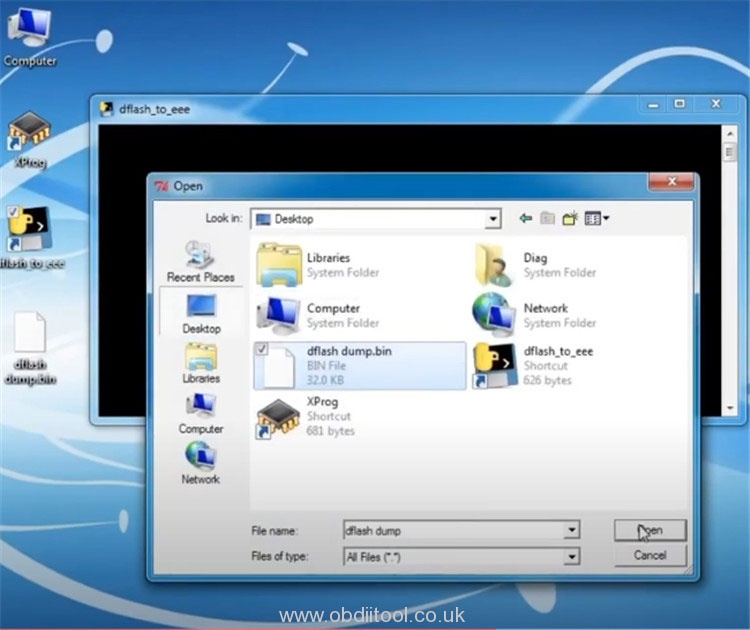
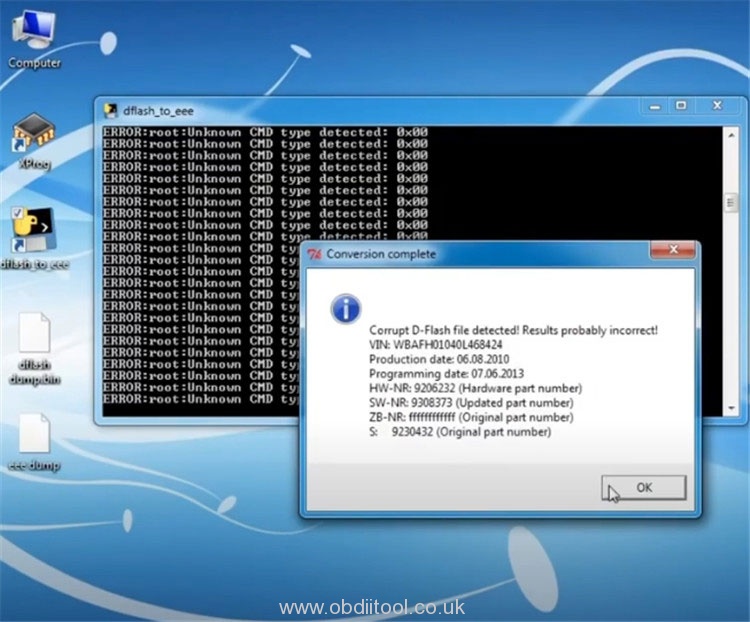
Open “dflash_to_eee” file on the desktop and select “dflashdump.bin” file just saved
Then save it with a new file name “eee dump”
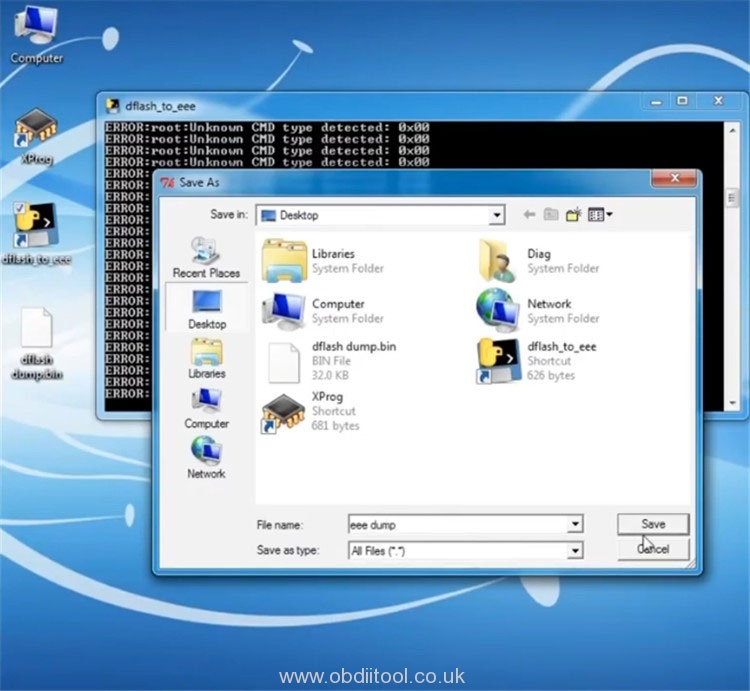
Conversion complete! The corrupt D-Flash file detected!
Ensure you write to EEE partition and not back to D-Flash and always verify after writing the image to the device.
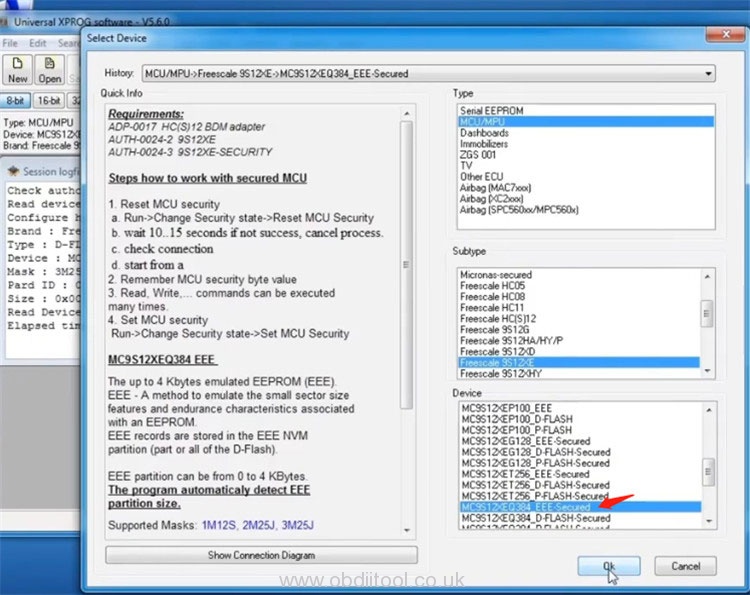
Back to Xprog V5.6.0 software and select device “MC9S12XEQ384 EEE. Secured”
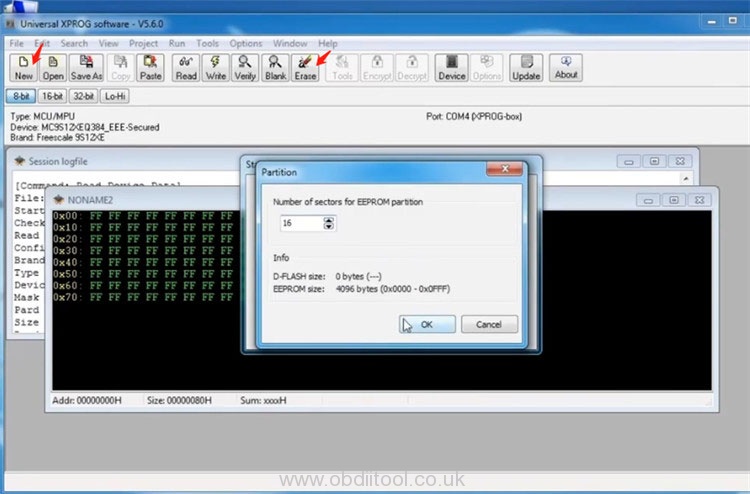
Then click “New” and click “Erase” to erase the device
Change the number of sectors for EEPROM partition to 16
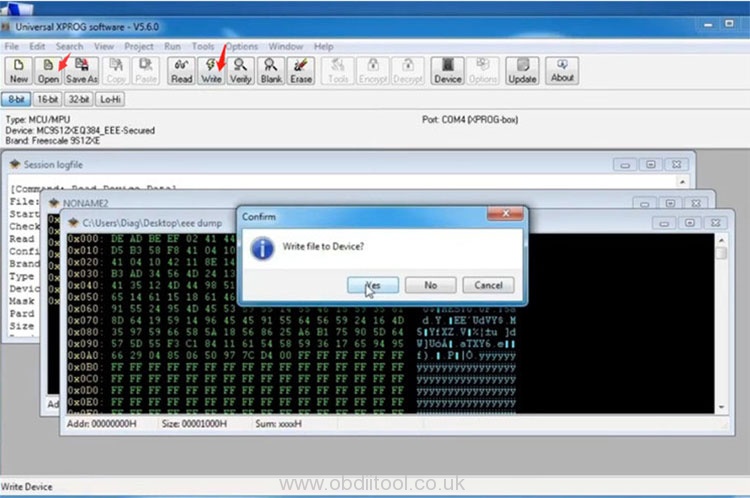
Click “Open” -> select “eee dump” file
Then click “Write” to write the file to device
After the file is written successfully, unsolder all connecting wires and install the BMW FRM module back to the car.
Done!
Please kindly notice:
The newest XPROG software is V6.12, you can free download it referring to the following post.
Free Download Xprog Software 6.12 5.84, 5.74, 5.60, 5.55, 5.51, 100% Works