


3V@~QDUHVCO2A)U6Q")
When do you need to calibrate the Xhorse Condor XC-Mini II? How to calibrate? These are the questions that must be considered before cutting keys.
When to calibrate Condor XC-Mini Plus?
1.After receiving a new machine or after using it for a period of time, recalibrate the machine to ensure the accuracy of the machine;
2.If you reset the distance between the probe and the milling cutter, all fixtures need to be recalibrated;
3.The values of the machine may be different. After replacing the motherboard or upgrading the firmware, please re-execute the calibration process.
Note: Make sure to clean the fixture and keep the fixture clean no debris
How to calibrate?
-Adjust high level
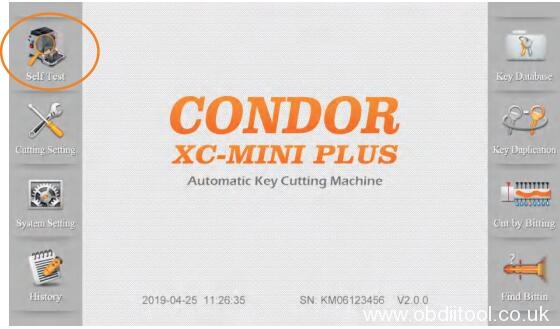
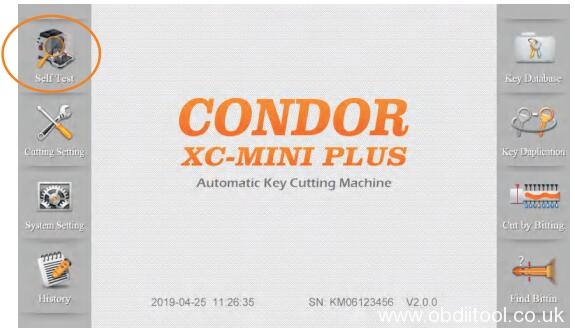
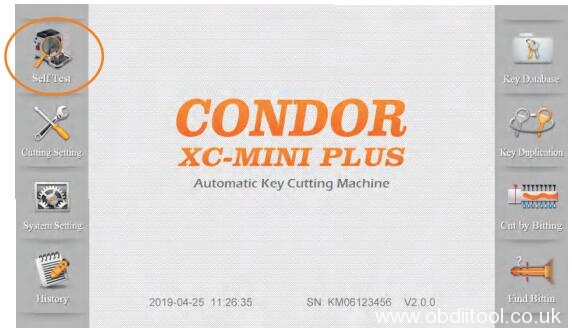
Step 1: Open Condor XC-MINI Plus tablet
Enter main interface and click on ‘Self Test’.
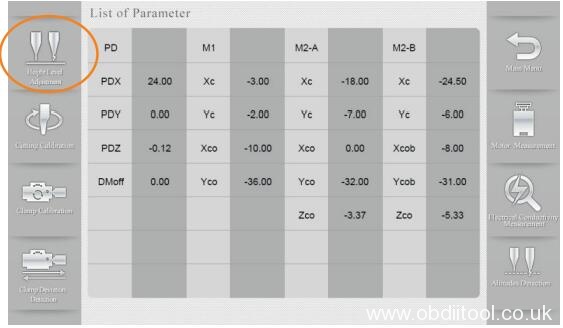
Step 2: Click on ‘Height Level Adjustment
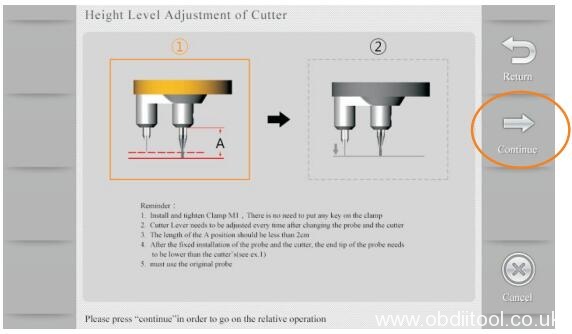
Step 3: Adjust the height of cutter and probe by following the tips on the screen, then click on ‘Continue’ to the step of adjustment
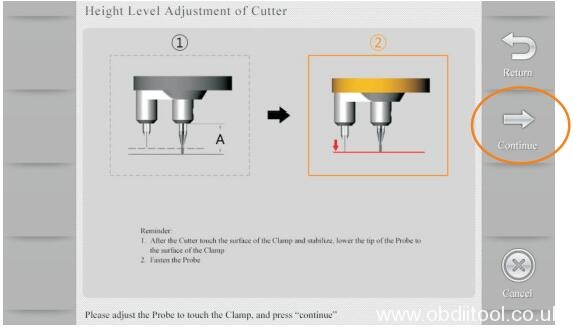
Step 4: After machine stopped, follow the screen tips to adjust the probe, let it at same height with cutter, then ‘Continue’
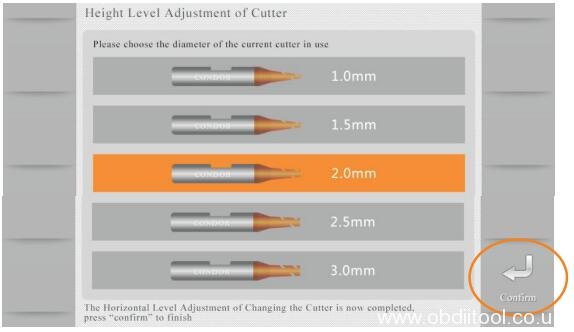
Step 5: Select the correct diameter of cutter and confirm it
–Calibrate clamp
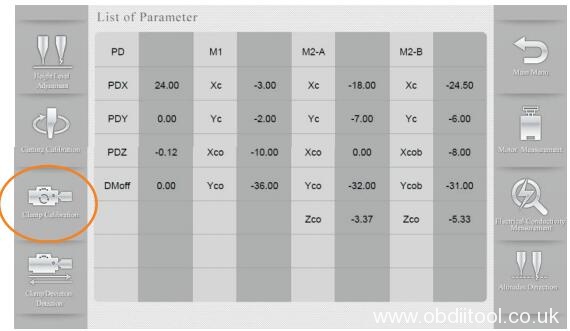
Step 1: Enter Condor XC-MINI II main interface
Select ‘ Self Test’ -> ‘Clamp Calibration’
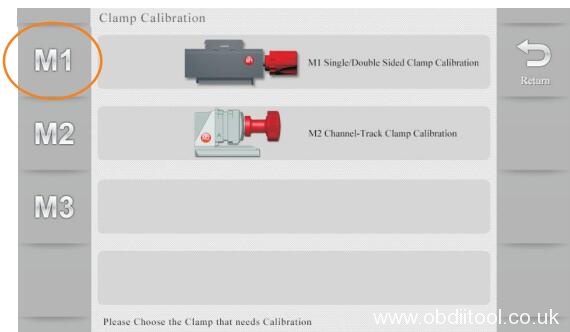
Step 2: Select clamp M1 and proceed by following the tips on the screen
Step 3: Please put the HON66 key blank according to the screen, then tighten the clamp, click on ‘Continue’, calibration finished

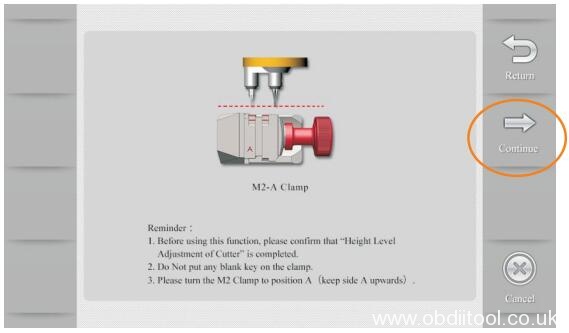
Step 4: Enter clamp M2 calibration, rotate side A upward and do not put any keys on the clamp
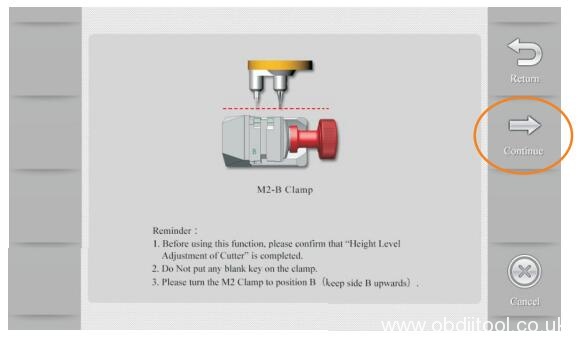
Step 5: Follow the tips on the screen, rotate side B, C, D upward one by one to calibration until M2 clamp calibration finished
– Calibrate cutting
Step 1: Enter main interface
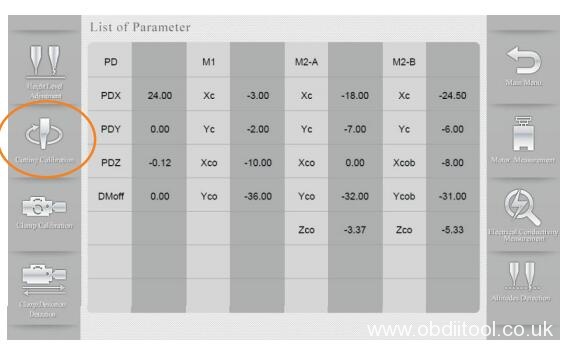
Click on ‘Self Test’-> ‘Cutting Calibration’
Step 2: Operate by following the tips and click on ‘Continue’
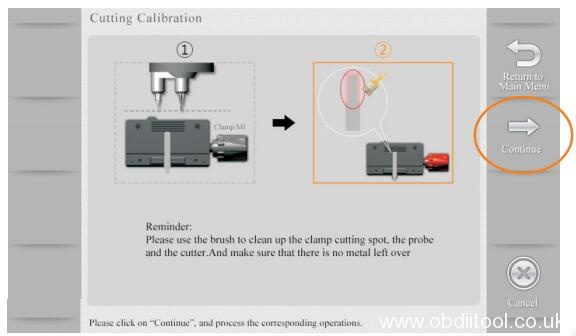
Please kindly notice:
Please use new key blank, used HON66 will not working for cutting calibration
Step 3: Clean the cutter/probe/clamp cutting area by brush
Then click on ‘Continue’ and calibration has finished
That’s all! Hope it helps you!
http://www.obdiitool.co.uk/wholesale/xhorse-condor-xc-mini-plus-key-cutting-machine.html